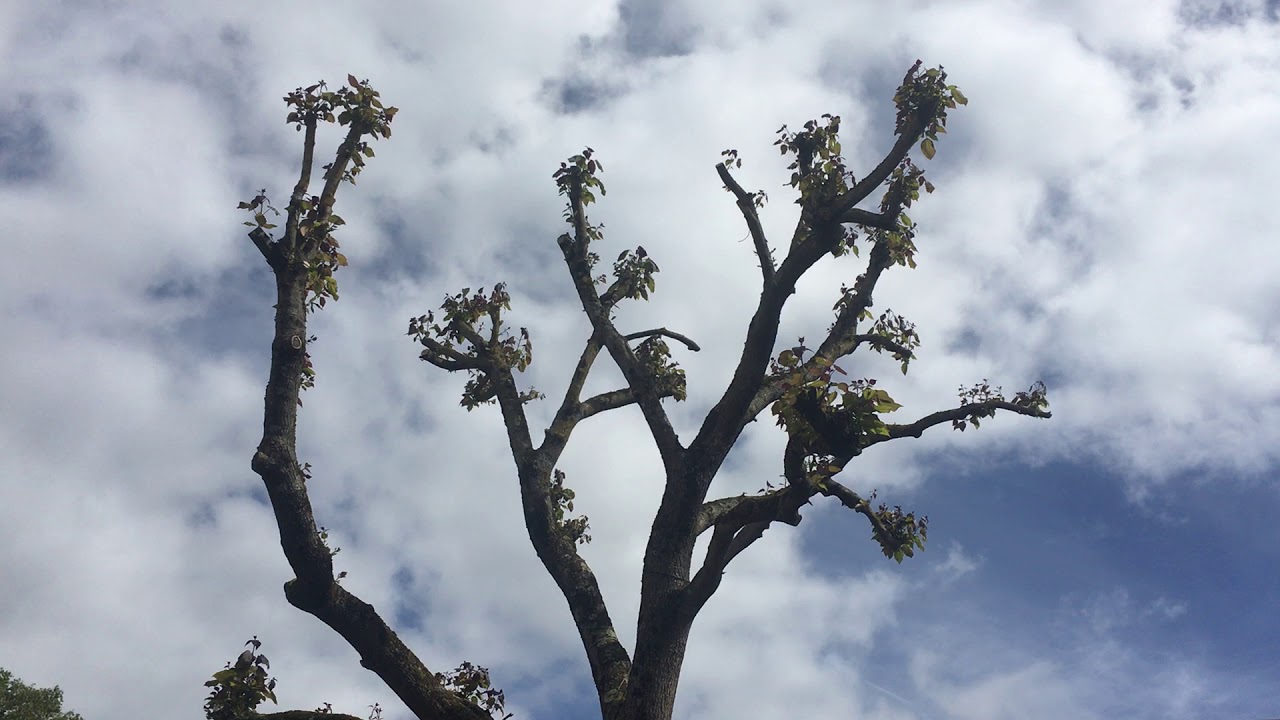
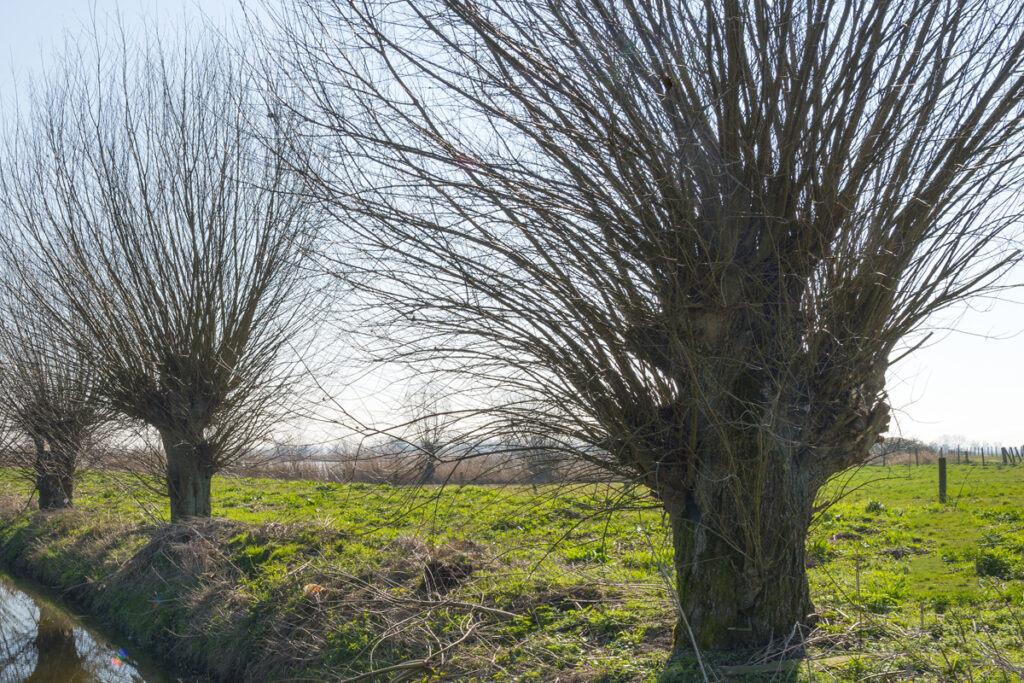
Pollarding is a tree pruning technique that develops a framework of bare scaffold branches with a gnarly knob at the end of each branch. Every spring numerous straight long and leafy sprouts emerge from these knobs to produce a dense, shady canopy.
As far as we know pollarding started in the Middle Ages in Europe in order to produce kindling for fire places and fodder for livestock. Nowadays we pollard to manage the size of a tree that is too large for its space and/or to create a formal look in the landscape.
A good example of pollarding is the band shell area in San Francisco’s Golden Gate Park. It hosts dozens of pollarded sycamores or plane trees (Platanus x acerifolia).
To be perfectly honest I’m not a fan of pollarding. I do respect the impact that a grove of pollarded trees has on a formal landscape. But it also pains me to see stunted versions of what could be beautiful, towering majestic trees. I’d prefer to see smaller trees chosen for smaller spaces. And a formal garden can be created in so many other ways.
The biggest problem I have with pollarding is that it is so often done wrong. A properly pollarded tree can live a long and healthy life. But it needs regular and appropriate maintenance.
- The sprouts should be removed every one to two years. Pollard sprouts are weakly attached to the knob. If they are left on the tree for years and years the sprouts become thick and heavy. They become a potential hazard.
- The sprouts should be removed all the way back to the knob. In other words don’t leave little stubby branches on the knob. Cutting all the way back to the knob makes it easier for the tree to seal off the pruning wound and assists the tree in preserving important energy resources (carbohydrates) in the knob. This is because pollard knobs compartmentalize readily.
- Start the pollarding process when the tree is young – two or three years old. Ideally you will never need to cut a limb or sprout that is more than 1” in diameter. Over a few years a small knob will develop and expand. Each year the knob will grow larger and will harbor dormant buds, carbohydrates and wound calluses.
- Do not attempt to start the pollarding process on a mature tree that has not been pollarded before. This is REALLY hard on a tree. Sprouts will emerge from below the cuts and it will look sort of like pollarding. But bluntly cutting mid-node through
- thick and/or mature branches is called topping. Trees heal poorly from topping cuts. Topping cuts instigate branch decay due to the slow healing process and exposure to pathogens. Topping cuts weaken the tree’s structure and can shorten the life of the tree. How do you know if the tree has been pollarded before? It has a knob.
- Choose trees that take well to pollarding. Sycamores, mulberries and horse chestnuts respond well. You can find other species online by searching for “trees for pollarding”.
More to read: How to Get the Best Melbourne Buyers Agent on Your Side