Sheet mulching is a gardening technique that suppresses weeds and builds fertile soil. In sheet mulching thick layers of organic matter are placed on the ground lasagna style. These layers are then left to decompose ultimately creating a rich planting medium (compost) that is terrific for vegetable gardens and ornamental planting beds.
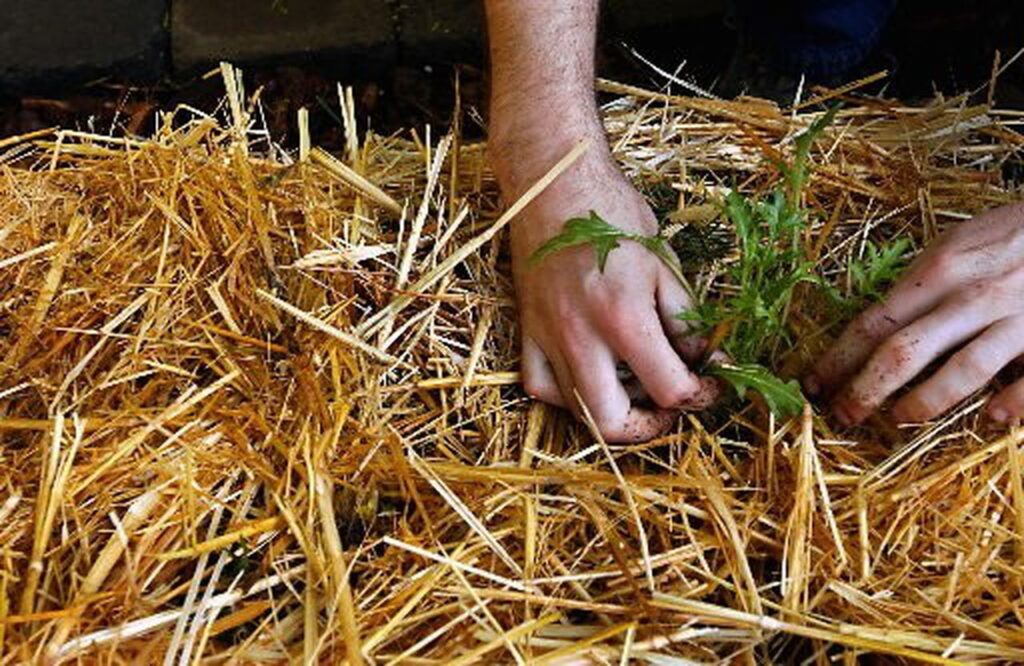
The advantage of sheet mulching over composting in a bin is that the finished compost does not have to be hauled to the actual planting bed. It is created right on top the planting bed. The process can take three to six months so it is best to plan ahead and sheet mulch the season before you want to install your plants. However, it is possible to install some plants right after you sheet-mulch by punching a hole through the sheet mulch for each plant and popping them in.
Sheet mulching is effective at suppressing weeds because it is so thick – as much as 12 inches – and because one of the bottom layers has no holes in it for air and light to sneak in. The weeds and anything else underneath are snuffed out. You can even sheet mulch right over the top of sod. There is no need to remove the lawn ahead of time.
I’ve taught many people how to sheet mulch in the permaculture workshops I used to lead at Kenwood Permaculture. My goal in this article is to describe various sheet mulching options. Each one is progressively more complex. But they are all easy and fun, especially with a group of people at a sheet-mulching party.
Materials
Don’t worry about the length of this list. You can successfully sheet mulch with just three of these items.
a. Sheet Mulch
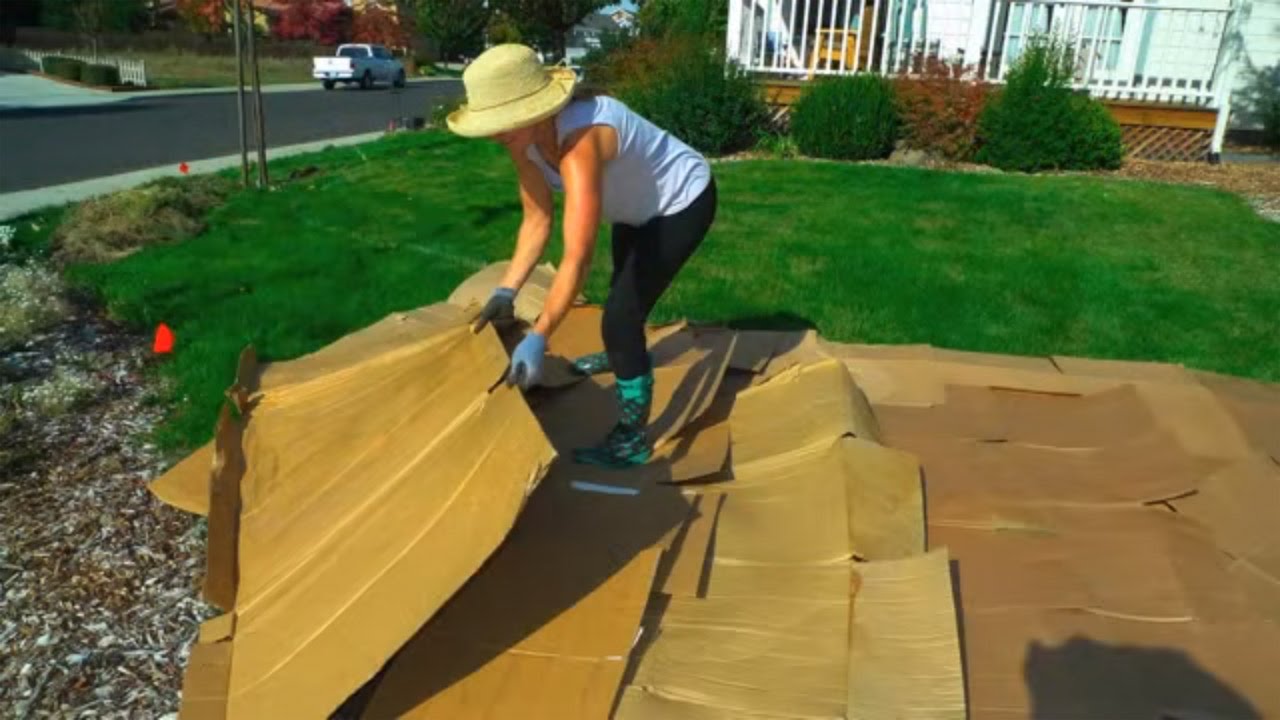
The sheet mulch layer is a solid layer of overlapping cardboard pieces (remove tape – it doesn’t decompose), newspaper (¼” thick -no glossies), old 100% cotton sheets or blankets, or wool carpet. No synthetics.
The most commonly used sheet mulch material is cardboard. Try to find plenty of big pieces from house-hold appliances or computers. They cover a lot more square footage than a shoe box.
b. Soil Amendments
This depends on your soil needs. Use gypsum for clay soil or compacted soil. Use bone meal, blood meal, or cottonseed meal to increase nitrogen. Use lime if your soil is too acid. Green sand, rock dust and kelp have trace minerals. Elemental sulfur increases soil acidity.
c. Bulk organic mulch
Straw, weed free garden waste, garden trimmings, leaves, bark, stable straw.
Straw from bales is easy to work. It often peels off in nice layers and is compacted so it doesn’t blow around in the wind. Straw bales cost more than other bulk mulches obtained from your own backyard. Other bulk mulches (yard waste, trimmings, leaves tend to be courser than straw and can have a lot of air pockets when you put them down. If you are aiming for a 6” thickness they will settle out much lower – maybe 3-4” so you have to compensate by adding more. Don’t use hay. It has seeds in it
d. Compost
e. Manure
Goat, sheep, horse, chicken, steer. See if you can find some for free at local stables. Don’t use dog or cat feces.
f. Top mulch layer
Shredded bark, leaves, straw. This is basically the same material as the bulk mulch layer.
g. Water
You’ll need a fair bit of water. But a proper compost pile is moist – not soggy. You might be concerned about adding water at every level if you live in an arid or semi-arid location. The trade-off is that you are building rich, organic soil that will hold moisture more effectively and will produce beautiful crops and ornamental plants.
Tools
1) Gloves
2) Scissors to cut twine from straw bales
3) Tarps to hold your compost, manure and other amendments close to the sheet mulch area
4) Large buckets, transfer shovels, pitchforks to move amendments around
5) Hose(s) with sprayer(s)
Planning
1) Ideally you’ll sheet mulch the season before you plan to actually use the planting bed. In regions with a distinct rainy season it is best to sheet mulch right before the rains as more consistent moisture assists decomposition.
2) Calculate the square footage of the area you will sheet mulch to determine how much material you will need. It isn’t much fun to get geared up for a sheet mulching project and then run out of cardboard half-way through the job. For a 23’ by 7’ planting bed you’ll need (23 x 7 = 161) 161 square feet.
3) Choose the sheet mulching method you will use. Based on this calculate the cubic footage of bulk mulch, compost, manure or other amendments you will need. An online calculator for cubic feet is http://www.gardeners.com/Soil-Calculator/7558,default,pg.html. Eight inches of bulk mulch on top of that 161 square foot area requires about 4 cubic yards of mulch. First, convert to inches – (23’x7’) = (276” x 84”) x 8”. Then use the online calculator which gives you 108 cubic feet or 3.975 cubic yards of mulch.
4) Gather all your materials and tools ahead of time. It is easiest if you have them all staged near the sheet mulch area.
Three Easy Sheet Mulching Methods
I call these approaches: a) simple; b) advanced; and, c) super. The simple approach is faster and cheaper. The more complex approaches take more time, materials and money but they potentiate long-term soil fertility by aiming for a balanced carbon to nitrogen ratio that is ideal for composting.
Option 1. Simple SHEET MULCHING
1) Slash down tall weeds. Leave the weeds on the ground.
2) Water the area to be sheet mulched.
3) Put down a good layer of cardboard (or newspaper ¼” thick). Make sure there are no gaps between the cardboard. The pieces must overlap. This is the “sheet” layer. Water generously.
4) Put down 6” of straw. Water generously.
5) Wait 3-6 months for it to decompose.
Option 2. Advanced SHEET MULCHING
1) Slash down weeds. Leave the weeds on the ground.
2) Water the area to be sheet mulched.
3) Add compost and/or manure. This layer can be 1/4″ – 3” thick. Water generously.
4) Put down a layer of cardboard (or newspaper ¼” thick). Water generously.
5) Add more compost and/or manure – 1/4″ – 3” thick. Water generously.
6) Put down 6-12” straw or mulch. Water again.
7) Wait 3-6 months for it to decompose.
Option 3. Super SHEET MULCHING
1) Water the area thoroughly beforehand.
2) Slash down tall weeds. No need to pull them out.
3) Add soil amendments as needed. Sprinkle them around generously. Water.
4) If your soil is compacted, break it up a little with a pitch fork or spade.
5) Add a 1/2″-1″ of manure, blood meal, fish meal, cottonseed meal, grass, and/or kitchen scraps. Add water.
6) Lay down the cardboard or ¼” newspaper. Remember that all pieces should overlap.
7) Add another 1/2″ – 1″ of manure, blood meal, fish meal, cottonseed meal, grass, and/or kitchen scraps. Water generously.
8) Bulk organic mulch – (straw, yard waste, etc) 6-12″. Water generously.
9) Add 2” of compost. And more water. Supplement with soil/manure if you don’t have enough compost.
10) Add a 2” Finish layer of mulch, straw, or shredded bark(looks nicest if it is in a visible area) Add a final dose of water.
11) Wait 3-6 months for it to decompose.
More to read: The Do’s and Don’ts of Tree Pollarding